
onion rings
- Oct 27, 2017
- 4 min read

Sometimes, like any human being living in America, I want to eat something that's bad for you, on purpose. I try to play it off on here like I enjoy being raw til four, but the truth is that no person wants to live that life 100% of the time. It's soul-crushing, and after a while you start to forget what real food tastes like. Which, in my experience, usually leads to eating a lot of it when the opportunity presents itself. It's understandable. An important part of being an adult is learning how to treat these unnatural impulses in a way that responsibly satisfies the desire to sin.
What's on our collective plate this time, you ask? A handful of raw onion slices, just begging for a chance to be deep-fried and not end up on yet another sheet of roasted veggies. Today, I will oblige them and help make their tiny little dreams come true.
one half of an onion, cut into cross-sections
two cups of canola oil
one quarter of a cup of rice flour
salt
pepper
garlic granules
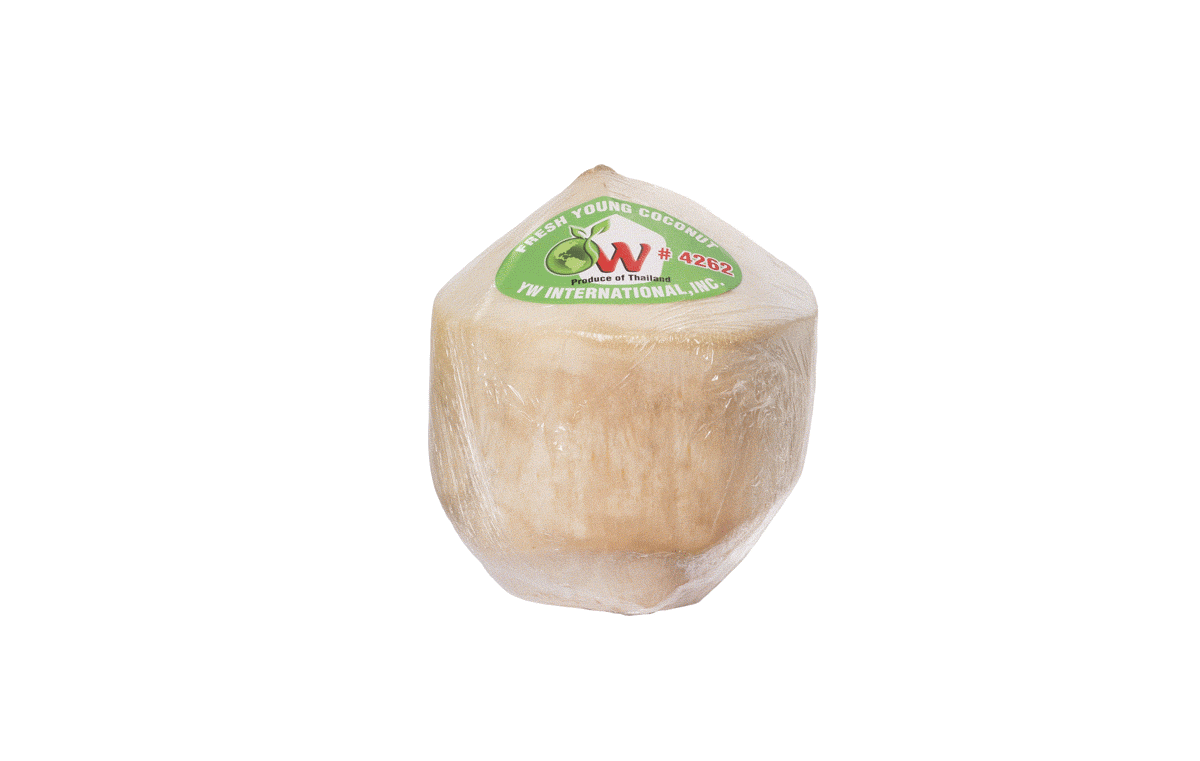
the meat of a coconut
And now, for your enjoyment, I present the delicious train-wreck that was The Onion Ring Saga.

We're about to make pinkbelly history with our first communal breading station; no corners were cut in the name of these rings. We're doing this in three steps, Hungarian-style, just like Noreen does in her kitchen.
A little back-story on the coconut: my friend's sister runs an actual food blog, one with enough of a following to get invited to press events and things of that nature. Recently she's been kind enough to let me tag along and snap photos, mostly I think because she sees what a hermit I am and wants to get me out of the house a little bit. It's something I appreciate deeply, and we always have a ball. This beautiful specimen is from one such event, and the day before I shot this recipe, I was sipping bourbon out of it. It finds new life in today's batter.
Use a spoon to scoop out the gelatinous insides. Give the stuff a quick whiz in the blender-cup with some water or non-dairy milk, whatever you have on hand. Anything wet will do.

Sift your seasonings into the flour. Pat the blender-cup dry and toss in a few pieces of bread, toasted.

Be honest, how ridiculous does this picture look? Most brands of commercially-produced gluten-free bread crumbs are at least four or five dollars at the store. Do I look like somebody with a real job?

Separate your onion slices into rings; it's easy because they grow from the inside out in layers. Express yourself by creating something beautiful.

One by one, put them through the motions. If The Vegan Zombie has taught me anything, it's that you always want to double up on your wet step/flour step. This is not only a wise move structurally, but also in terms of crunch-factor. Essential. Toss them in again.

The final leg of the journey: giving these guys a bread crumb skin. Add a bit more lube if necessary. They should stick to the outsides of the rings with no problem by this point in the game.

Here's what it looked like after I really started getting into the process. It had turned into such a hilarious mess that I had to snap a photo with gummy fingers. What the fuck.

Here they are, sitting pretty and ready to bathe in hot oil. They took a lot of work, and I'm feeling ready to be gratified materially. Get the canola ready on the stove. We're about to send these things to heaven.

Oh my god, I was so excited about this part. What is it about deep-frying things at home that is so much fun? I don't do this often, making today's escapade a welcome deviation from my usual world of disappointingly healthy food options. I am a pig, but, like every other woman, I do try to watch my girl-ish figure.

That last part up there was a joke; I'm pretty sure I my figure hasn't been something one would consider "girl-ish" since I was in the first grade, and even that's sort of pushing it. By this point my excitement about the project had reached an apex; here I am watching the fireworks and trying not to singe myself on the burner.
You don't want to leave them in for too long. Mine browned up very quickly, almost unintuitively so. Just keep pushing them around with your tongs until you feel that they're ready to come out. The bubbles sometimes make it hard to see what's actually going on.

If you seasoned your flour adequately, there should be no need to salt them once they come out of the oil. Let them rest on a plate with a paper towel for a few minutes. Once they're cool enough to bite, you're off to the races.
I wanted something that tasted like fast food because I don't really indulge in that very often anymore, and trust me when I say that these things delivered. They're great for girl's night, game day, or, if you're anything like me, a lonely Friday afternoon much like the one that came before and surely similar to the one that will inevitably follow.
This is your humble host, signing off for now. Don't get into too much trouble this weekend, comrades. I'll see you guys here Monday.

Comments